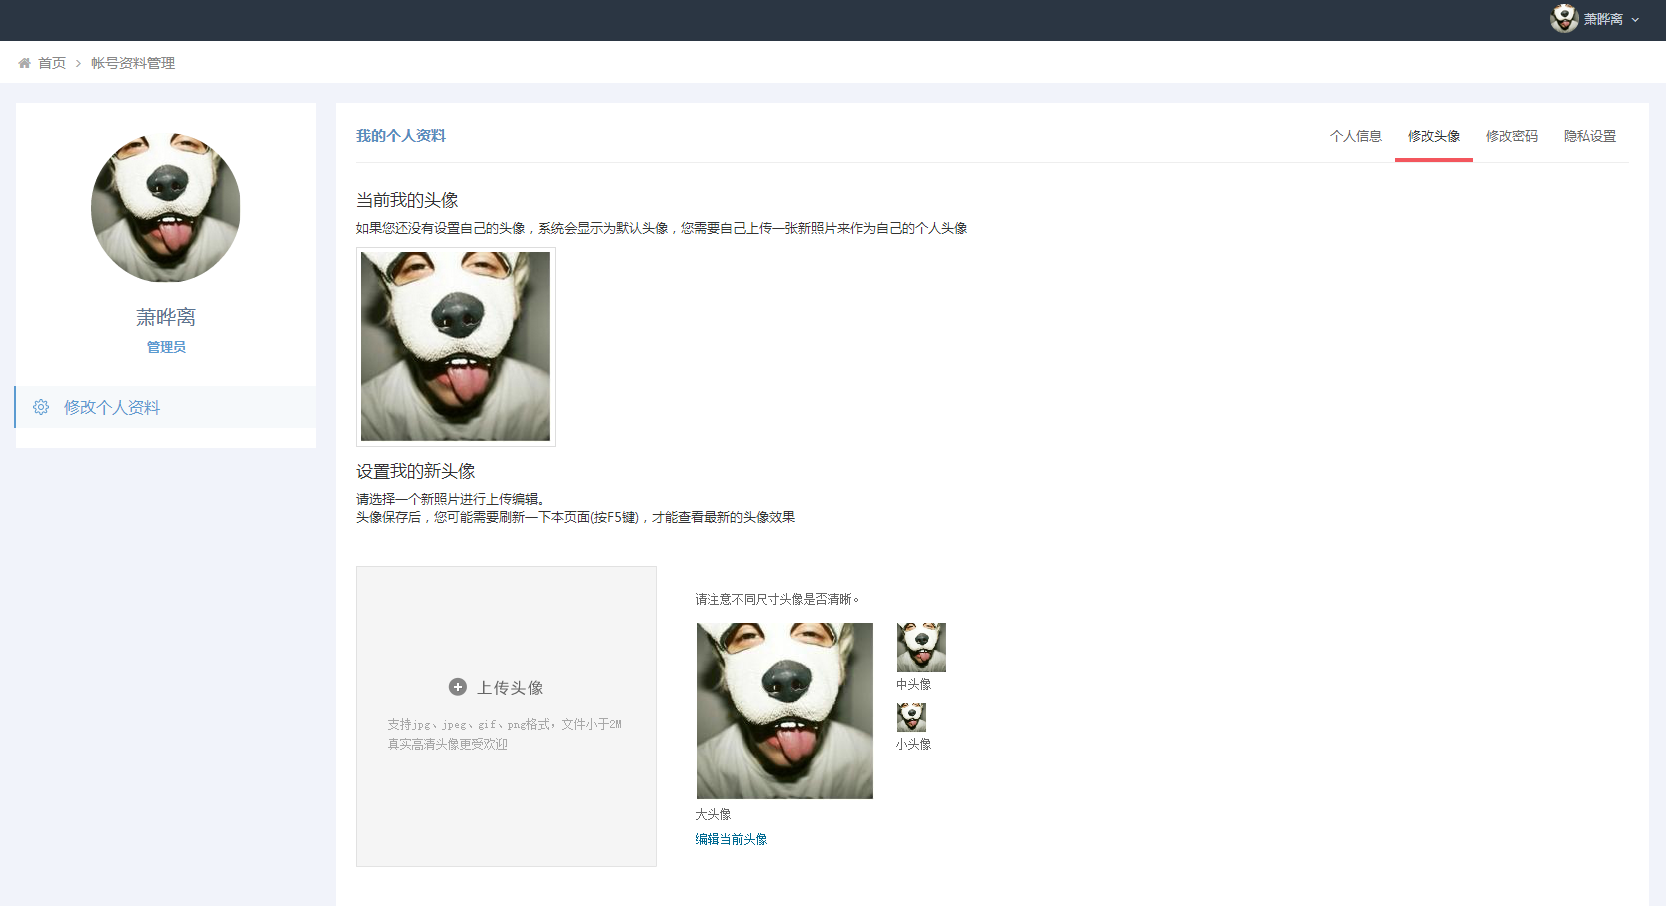
Laravel5.0头像上传功能实现
该头像上传用到的flash和js为腾讯微博头像上传组件,目前网上几个头像上传组件都是收费的,300~800不等,太贵了,自己学习用,就扒了腾讯微博的。
声明:我只是学习开发使用,如果侵权我可以停止使用并删除。
Route::post('/user/profile/avatar', 'User\UserController@postavatar');

Route::get('/avatar/{id}/{size}', 'User\UserController@getavatar');
首先是路由,post是上传接口,get是头像地址,这里我引用头像地址定义为:
http://yourdomain.com/avatar/bd59e49a1f6dd0cc92aeb7acb68098e8/180
这样的格式,其中id是文件编码,size是你要引用的头像尺寸大小。
接下来是控制器:
这段是用来接收前端flash组件post过来的数据
public function postavatar()

{

    $uid = Auth::user()->id;

    if(Input::get('_ps1') == "gettmp"){

        $file = Request::file('Filedata');

        if($file->isValid()){

            $clientName = $file->getClientOriginalName();

            $tmpName = $file->getFileName();

            $realPath = $file->getRealPath();

            $extension = $file->getClientOriginalExtension();

            $mimeTye = $file->getMimeType();

            $newName = md5(date('ymdhis').$clientName).".".$extension;

            $path = $file->move('uploads/avatar/data/tmp',$newName); //这里是缓存文件夹,存放的是用户上传的原图,这里要返回原图地址给flash做裁切用

            return '{"result":"0","url":"' . addcslashes($path, '/') . '"}';

        }

    }

    if(Input::get('ccef') && Input::get('g_tk')){

        $fileid = md5(date('ymdhis')."aohbaixiu");  // 这里是文件名生成,时间+自定义key用md5生成

        $filename = $fileid.".jpg";

        $avatar = $GLOBALS['HTTP_RAW_POST_DATA'];

        if(empty($avatar)) $avatar = file_get_contents('php://input');

        $filepath = "uploads/avatar/data/";//这里是用户最终裁切好的头像存放目录,当然你可以按年月日目录结构来存放

        if(!file_exists($filepath)){

            mkdir($filepath,0777,true);

        }

        $file = fopen($filepath.$filename,"w");//打开文件准备写入

        fwrite($file,$avatar);//写入

        fclose($file);//关闭

        $path = "http://yourdomain.com/avatar/".$fileid."/180"; //这里返回头像引用地址,不过好像也可以不用返回,下面直接return '{"result":0}';

        User::where('id',$uid)->update(array('avatar' => $path));

        return '{"result":0,"url":"'. addcslashes($path, '/') .'"}';

    }

    return '{"result":-999,"msg":"参数错误"}';

}
这段是引用头像的:
public function getavatar($id,$size)

{

    $fileid = $id;

    $filesize = $size;

    $filepath = "http://yourdomain.com/uploads/avatar/data/".$fileid.".jpg"; 这里要先设置好jpg图片url路径

    self::imagecropper($filepath, $filesize, $filesize); //这里执行裁切缩放,我在网上找的一段代码

}
private function imagecropper($source_path, $target_width, $target_height)

{

    $source_info = getimagesize($source_path);

    $source_width  = $source_info[0];

    $source_height = $source_info[1];

    $source_mime   = $source_info['mime'];

    $source_ratio  = $source_height / $source_width;

    $target_ratio  = $target_height / $target_width;


    // 源图过高

    if ($source_ratio > $target_ratio)

    {

        $cropped_width  = $source_width;

        $cropped_height = $source_width * $target_ratio;

        $source_x = 0;

        $source_y = ($source_height - $cropped_height) / 2;

    }

    // 源图过宽

    elseif ($source_ratio < $target_ratio)

    {

        $cropped_width  = $source_height / $target_ratio;

        $cropped_height = $source_height;

        $source_x = ($source_width - $cropped_width) / 2;

        $source_y = 0;

    }

    // 源图适中

    else

    {

        $cropped_width  = $source_width;

        $cropped_height = $source_height;

        $source_x = 0;

        $source_y = 0;

    }


    switch ($source_mime)

    {

        case 'image/gif':

            $source_image = imagecreatefromgif($source_path);

            break;


        case 'image/jpeg':

            $source_image = imagecreatefromjpeg($source_path);

            break;


        case 'image/png':

            $source_image = imagecreatefrompng($source_path);

            break;


        default:

            return false;

            break;

    }

    $target_image  = imagecreatetruecolor($target_width, $target_height);

    $cropped_image = imagecreatetruecolor($cropped_width, $cropped_height);


    // 裁剪

    imagecopy($cropped_image, $source_image, 0, 0, $source_x, $source_y, $cropped_width, $cropped_height);

    // 缩放

    imagecopyresampled($target_image, $cropped_image, 0, 0, 0, 0, $target_width, $target_height, $cropped_width, $cropped_height);


    header('Content-Type: image/jpeg');

    imagejpeg($target_image);

    imagedestroy($source_image);

    imagedestroy($target_image);

    imagedestroy($cropped_image);

}
前端HTML:
<div id="head">

                                                        <div id="cutphoto" class="head cutphoto" style="width: 650px;height: 580px;padding:0;"></div>

                                                    </div>
前端JS:
_token = {{time()}};

_uidurl = "{{ Auth::user()->avatar }}";

_tmpurl = "{{ url('/user/profile/avatar') }}";

_imgurl = "{{ url('/user/profile/avatar') }}";

_gid = {{Auth::user()->gid}};
uploads/avatar/plugin/avatar.js
var cutPhotoJs = function() {

return {

    initSystems : function() {

        var soCut = new SWFObject("uploads/avatar/plugin/avatar.swf", "qqminiblog", "100%", "100%", "9.0.28", "#FFFFFF");

            soCut.addParam("allowNetworking", "all");

            soCut.addParam("allowScriptAccess", "sameDomain");

            soCut.addParam("allowFullScreen", "true");

            soCut.addParam("scale", "noscale");

            soCut.addParam("wmode", "transparent");

            soCut.addVariable("wbVipWhite", "true");

            soCut.addVariable("uidurl", _uidurl+"?cache="+Math.random());

            soCut.addVariable("tmpurl", _tmpurl);

            soCut.addVariable("tmpimgurl", "noavatar_big.gif");

            soCut.addVariable("imgurl", _imgurl);

            soCut.addVariable("langver", "zh_CN");

            soCut.addVariable("token", _token);

            soCut.addVariable("_ps1", "gettmp");

            soCut.addVariable("_ps2", "null");

            soCut.addVariable("xmlurl", "uploads/avatar/plugin/picdata.xml");

            soCut.addVariable("headpretty", "true");

            soCut.write("cutphoto");

    },

    uploadFileError : function(type, code) {

        if ( type == 'filesize')

        {

            alert('文件大小不超过2M');

        }

        else if ( type == 'filename')

        {

            alert('请选择jpg、jpeg、gif、png格式的图片');

        }

    },

    uploadingError : function(ecode) {

        alert('似乎发生了一点点意外。请稍后重试');

    },

    uploadingSucess : function(scode) {

    },

    uploadedError : function(ecode) {

        if (ecode == '-1')

        {

            alert('请选择jpg、jpeg、gif、png格式的图片');

        }

        else if (ecode == '-2')

        {

            alert('文件大小不超过2M');

        }

        else if (ecode == '-3')

        {

            alert('您的登录状态消失,请重新登录');

            window.location.reload();

        }

        else

        {

            alert('似乎发生了一点点意外,请稍后重试');

        }

    },

    uploadedSucess : function(scode,type) {

        alert("您的头像已修改成功!");

        window.location.reload();

    },

    cancelProgramm: function() {

        window.location.reload();

    }

}

}();


function isCanUseCustomHead(){

if(_gid == 1){

    return 1;

}else{

    return 0;

}

}

function adjustFlashHeigh(v){

$('cutphoto').style.height = v + 'px';

if($("qqminiblog"))

{

    $('qqminiblog').style.height = v + 'px';

}

}

function dispatchAS3Method(v,param){

if (v == 'error_use_custom_head'){

    var WBvipWhite = 1;

    if(WBvipWhite == 1){

        alert('您当前的用户组无法保存相框效果('+param+') ');

    }else{

        alert('您当前的用户组无法保存相框效果('+param+') ');

    }

}

}
引用完avatar.js后要:
cutPhotoJs.initSystems();
如果有不明白的地方可以留言,如果我懂的地方肯定会为大家解答的。
其实我也是菜鸟一只,刚学laravel,还请大神们多多关照,源码有问题的地方还请大神们指出。
另外,哪位大神可以给一份laravel的图片验证码?
